
Coffee Drip Bag Brewing Guide: Water Volume, Temperature, and Brew Time Compared
Coffee drip bag brewing guide: Start with one bag, 200 ml of water at 92–94°C, a 20–30 second bloom, and a total brew time of about 2–3 minutes. If you prefer a lighter cup, work toward 240–250 ml; if you prefer more concentration, start around 170–180 ml. These are research-based starting recipes, not results from a Caffeine Brothers tasting trial.
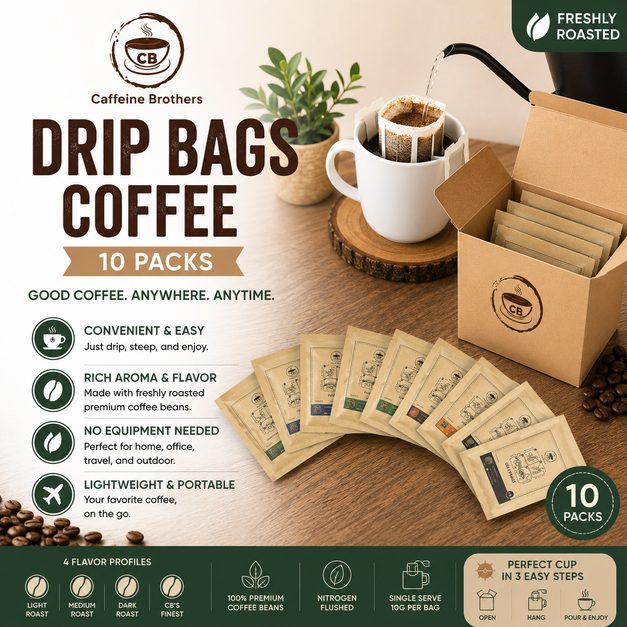
Quick answer: Start with one drip bag, 200 ml of water at 92–94°C, a 20–30 second bloom, and a total brew time of about 2–3 minutes. If you prefer a lighter cup, work toward 240–250 ml; if you prefer more concentration, start around 170–180 ml. These are research-based starting recipes, not results from a Caffeine Brothers tasting trial.
Drip bags look simple, but water volume, temperature, and contact time change the balance of the cup. This guide compares those variables using published brewing guidance from the Specialty Coffee Association (SCA) and coffee companies that publish drip-bag instructions. It gives you a repeatable starting point without implying that Caffeine Brothers performed the tests described in the original calendar brief.
Scope note: The original brief called for repeatable tests. No Caffeine Brothers test dataset was supplied for this article, so the recommendations below are clearly labeled as sourced guidance and practical starting points.
Coffee Drip Bag Brewing Guide: quick reference
| Goal | Total water | Starting temperature | Bloom | Target total time | Best first adjustment |
|---|---|---|---|---|---|
| Balanced everyday cup | 200 ml | 92–94°C | 20–30 ml for 20–30 sec | 2–3 min | Keep the same recipe and change only one variable next time. |
| More concentrated | 170–180 ml | 93–95°C | 20–30 ml for 25–30 sec | 2–3 min | Add water after brewing if the cup is too intense. |
| Lighter and longer | 240–250 ml | 90–92°C | 20–30 ml for about 20 sec | 2–3 min | Pour steadily; do not let the bag sit empty between pours. |
These ranges bring together published drip-bag instructions: Sarutahiko Coffee recommends about 200 ml, a short bloom, and a brief steep after the final pour; Filament Coffee recommends 250 ml and steady top-up pours; and Reba Coffee publishes 90–93°C, a 25–30 second bloom, 120–180 g of brew water, and a 120–150 second brew time. The table is a synthesis for home use, not a comparative experiment.
Why water volume, temperature, and time matter
1. Water volume controls concentration
For the same sealed drip bag, using less water normally produces a more concentrated beverage, while using more water produces a lighter one. Volume is the easiest adjustment because it does not change the bag or grind. Start with the amount printed on the product label when one is provided. If there is no label, 200 ml is a sensible first reference for a single cup.
Use a scale or a marked measuring cup. For normal kitchen brewing, 1 ml of water is close enough to 1 g for a recipe written in grams. Record the total water poured, rather than the amount left in the kettle.
2. Temperature changes extraction speed
The SCA’s brewer requirements place the water contacting coffee in a 92–96°C range during the brew cycle. An SCA summary of brewing-temperature research also explains that temperature affects extraction, while the final cup depends on the combined effect of extraction and strength. That is why temperature should be adjusted together with water volume and flow rate, not treated as a flavor switch by itself.
For a household kettle without temperature control, boil fresh water and allow it to cool briefly before pouring. Published drip-bag instructions commonly place the starting point around 90–96°C. If a cup tastes harsh, try a slightly lower temperature or a faster, more even pour. If it tastes thin and the bag drained quickly, try a little more heat or less water on the next brew.
3. Brew time controls contact
Contact time is the interval from the first pour until the final liquid drains. A short, fast brew can taste weak because less soluble material has been extracted. A very slow brew can taste heavy or bitter, especially when the bag is overfilled or the pour pauses for too long. The published guides used for this article cluster around roughly 2–3 minutes for a hot drip-bag brew.
Do not chase a stopwatch number if the bag design drains differently. Use the time as a troubleshooting signal: first check whether the bag is seated correctly, whether the water is being added in small pours, and whether the grounds are being flooded to the point of overflow.
Coffee Drip Bag Brewing Guide: step-by-step method
- Warm the cup. Rinse the cup with hot water, then empty it. Sarutahiko specifically recommends a pre-warmed cup.
- Open and hang the bag. Tear across the perforation, unfold the paper arms, and secure them on opposite sides of the cup. Keep the filter opening wide and stable.
- Bloom. Pour 20–30 ml over the grounds, making sure they are evenly wet. Wait about 20–30 seconds.
- Pour in pulses. Add the remaining water slowly in two to four small pours. Keep the water below the top seam so the bag does not overflow.
- Finish and remove. Let most of the liquid drain, then lift the bag by its handles. A short final drain is useful; squeezing the filter can add unpleasant fines.
- Taste before changing anything. Write down water volume, approximate temperature, total time, and whether the cup tasted weak, sharp, bitter, dry, or balanced.
Variable comparison: what to change first
| What you notice | First change | Why this is the cleanest test |
|---|---|---|
| Too strong or heavy | Increase water by 20–30 ml, keeping temperature and pour pattern the same. | It changes concentration without adding another extraction variable. |
| Too weak or watery | Reduce water by 20–30 ml, or slow the pours slightly. | It increases strength or contact while keeping the same bag. |
| Sharp, sour, or thin | Keep the volume, then try a slightly higher temperature within the published range. | More heat can increase extraction when the brew is running quickly. |
| Bitter, harsh, or drying | Keep the volume, then try a slightly lower temperature or faster flow. | It reduces the chance of pushing extraction too far. |
| Slow, clogged drawdown | Use smaller pours and avoid filling above the bag’s seam. | Overflow and a deep water column can slow the filter and extend contact. |
A practical Philippine-kitchen setup
You do not need a gooseneck kettle. A stable mug, a kettle, and a way to measure 200–250 ml are enough. If you have a thermometer, use it. If not, use a repeatable cooling routine and keep it consistent from cup to cup. Water quality also matters: use fresh drinking water and avoid water that has been repeatedly boiled.
For an office or café, write the chosen recipe on the brew station: bag size, total water, temperature target, bloom time, and removal cue. A measured recipe makes training easier and helps staff serve the same portion. See the staff training guide for portion control and waste reduction when turning a home recipe into a repeatable service procedure.
FAQ
Is a drip bag the same as a coffee bag?
No. A drip bag hangs over the cup and works like a small paper filter. A coffee bag sits in the cup and steeps by immersion. Sarutahiko publishes different water and time instructions for the two formats, so do not transfer a steeping recipe to a hanging drip filter without adjustment.
Should I use 200 ml or 250 ml?
Use the product label first. If no label is available, use 200 ml for a fuller starting cup or 240–250 ml for a lighter cup. Change in 20–30 ml steps so you can tell what made the difference.
Can I brew over ice?
Yes, but the ice dilutes the finished drink. Brew a more concentrated recipe, such as 170–180 ml of hot water, directly over a full glass of ice and taste before adding more water.
How should a café plan drip-bag inventory?
Count one sealed bag per planned serving, then add a clearly documented allowance for damaged packs, staff drinks, and service waste. For broader bean and serving forecasts, use the beans-per-month calculator as a planning worksheet, and keep the drip-bag count separate from bulk-bean inventory.
Sources and method note
This article is a research synthesis. It does not report a Caffeine Brothers experiment, blind tasting, or measured comparison. Recommendations are bounded by the published source ranges below and should be validated against the specific roast, grind, bag size, and packaging instructions for the product being brewed.
- Specialty Coffee Association, brewer certification requirements — 92–96°C contact-temperature requirement for certified brewers.
- Specialty Coffee Association, “Brewing Temperature and the Sensory Profile of Brewed Coffee” — discussion of temperature, extraction, and sensory results.
- Sarutahiko Coffee, drip-bag and coffee-bag brewing instructions — 200 ml drip-bag reference, 20-second bloom, and short final steep.
- Reba Coffee, drip-coffee brewing instructions — 90–93°C, 25–30 second bloom, 120–180 g water, and 120–150 second brew guidance.
- Filament Coffee, single-cup filter coffee-bag guide — 250 ml pour, steady top-ups, and troubleshooting for weak or strong cups.
- Bach Coffee, drip-bag brewing guide — 92–96°C water, 30-second bloom, and a 150–200 ml cup reference.
Last reviewed: September 26, 2026. Brewing parameters are starting points; always follow the instructions printed on your specific drip-bag package when they differ.
 Previous Post